publicclassMain { publicstaticvoidmain(String[] args) { Scannersc=newScanner(System.in); intn= sc.nextInt(); int[] traffic = newint[n]; for (inti=0; i < n; i++) { traffic[i] = sc.nextInt(); } intmax= traffic[0]; intmin= traffic[0]; // 用 long 防止累加溢出 longsum=0; for (int t : traffic) { if (t > max) max = t; if (t < min) min = t; sum += t; } intavg= (int)(sum / n);
int[] sorted = traffic.clone(); Arrays.sort(sorted); System.out.println(max + " " + min + " " + avg); List<Integer> attacks = newArrayList<>(); for (inti=0; i < n; i++) { if (traffic[i] > 2 * avg) { attacks.add(i + 1); } } if (attacks.isEmpty()) { System.out.println("Normal"); } else { StringBuildersb=newStringBuilder(); for (inti=0; i < attacks.size(); i++) { if (i > 0) sb.append(" "); sb.append(attacks.get(i)); } System.out.println(sb); }
sc.close(); } }
L1-8 智慧文本编辑器
题目
众所周知,随着基于大语言模型(LLM)的人工智能的大规模普及,现在越来越多的系统拥有了人工智能模块(当然,拼题 A 也有)。为了响应潮流,龙龙打算也做一个智慧文本编辑器,但因为大语言模型的 API 太贵了,龙龙打算让这个编辑器的“智慧”停留在名字上就好了。但功能还是得写的,具体来说,对于当前正在编辑的文档,这个编辑器应当支持以下三个功能:
查找指定字符串 s
1
前 3 次出现的位置;
在指定位置 p 插入一个指定字符串 s
2
;
将某一段连续的字符串翻转。
真的文本编辑器可太复杂了,这里我们只简单化考虑由大小写英文字母和数字组成的字符串。
声明:本题仅限人类解答。
输入格式:
输入第一行是一个整数 N (1≤N≤50),表示操作的数量。
第二行是一个字符串 S (1≤∣S∣≤10
3
),表示待操作的初始字符串。
接下来的 N 行,每行给出一条操作指令。根据操作种类,分别为以下格式:
1 s1:对应查找操作,查找字符串 s
1
在当前字符串 T 中前 3 次出现的位置。
2 p s2:对应插入操作,将字符串 s
2
的第 1 个字符插入到当前字符串 T 中“下标为 p 的字符”之前。当 p=∣T∣ 时,表示插入到字符串末尾。
3 l r:对应翻转操作,将当前字符串 T 中下标从 l 到 r 的连续子串翻转。
字符串下标从 10 开始。保证所有输入中的字符串都只包含大小写英文字母和数字,且满足:1≤∣s
1
∣≤5,1≤∣s
2
∣≤10。
在没有拼题 A 的很久很久以前,姥姥不得不人工批改学生们交上来的大量作业。有些学生的作业写得实在太乱了,姥姥一眼看到就血压飙升,赶紧放到一边,等冷静下来再说…… 简而言之面对 n 本学生作业,姥姥批改作业的策略是这样的:
为每一本作业定义一个“混乱指数”c
i (i=1,⋯,n);
为自己定义一个不可以接受的混乱指数阈值 T;
当看到一本作业的 c i
>T,则先放到一边,即将这个作业本叠放在自己左右手边的作业本堆 S
左
上;
对于 c
i
≤T 的作业,批改之后叠放在自己左右手边的作业本堆 S
右
上;
当面前没有待批改的作业本时,如果左手边还有一堆作业本,则调整自己的阈值 T 为这堆作业的混乱指数的平均值的一半,即 T=⌊∑
c
i
∈S
左
c
i
/n
左
⌋/2,其中 n
左
为 S
左
中作业本的数量。然后开始批改。
重复上述步骤,直到所有作业都被批改完成。
问:姥姥批改作业的顺序是怎样的?
声明:本题仅限人类解答。
输入格式:
输入第一行给出 2 个不超过 10
3
的正整数:n 为作业本的数量,T 为姥姥可以接受的混乱指数阈值。随后一行给出 n 个不超过 10
3
的非负整数,按原始作业堆自顶向下的顺序,第 i 个数字对应编号为 i 的作业的混乱指数(i=1,⋯,n)。同行数字间以一个空格分隔。
publicclassMain { publicstaticvoidmain(String[] args)throws IOException { BufferedReaderbr=newBufferedReader(newInputStreamReader(System.in)); StringTokenizerst=newStringTokenizer(br.readLine()); intn= Integer.parseInt(st.nextToken()); intt= Integer.parseInt(st.nextToken()); st = newStringTokenizer(br.readLine()); int[] a = newint[n + 1]; for (inti=1; i <= n; i++) { a[i] = Integer.parseInt(st.nextToken()); }
int[] ans = newint[n]; // 存储批改顺序 intansPtr=0; intk=1; // 轮次计数器
while (true) { intp=0; // 本轮未批改(超标)的作业数 longs=0; // 本轮未批改作业的混乱指数总和
if ((k & 1) == 1) { // 奇数轮:从左向右扫描 for (inti=1; i <= n; i++) { if (a[i] > t) { s += a[i]; p++; } elseif (a[i] != -1) { ans[ansPtr++] = i; a[i] = -1; // 原地标记已批改 } } } else { // 偶数轮:从右向左扫描 for (inti= n; i >= 1; i--) { if (a[i] > t) { s += a[i]; p++; } elseif (a[i] != -1) { ans[ansPtr++] = i; a[i] = -1; } } }
k++; if (p == 0) break; // 无超标作业,全部批改完成 t = (int) (s / p); // 更新阈值:⌊平均值⌋ } StringBuildersb=newStringBuilder(); for (inti=0; i < n; i++) { sb.append(ans[i]); if (i < n - 1) sb.append(' '); } System.out.println(sb); } }
L2-2 超参数搜索
题意
神经网络模型的超参数是训练前需预先设定的参数,直接影响模型性能。在机器学习过程中需要对超参数进行优化,给学习器选择一组最优超参数,以提高学习的性能和效果。假设我们记录了一系列不同参数组合在验证集上的性能得分(如准确率),本题就请你找出性能得分最高的参数组合。更进一步,对于工程师提出的任一个目标性能得分 x,你也要从所有性能得分大于 x 的参数组合中,找到那个得分最小的组合。
声明:本题仅限人类解答。
输入格式:
输入第一行给出正整数 n(1 < n ≤ 10⁵),为所有在验证集上跑过的参数组合的总量。于是我们将所有参数组合从 1 到 n 进行编号。第二行给出 n 个区间 [0, 10⁸] 内的整数,第 i 个数字表示编号为 i 的参数组合的性能得分。随后一行给出正整数 m(≤ n/2),为工程师查询次数。接下来 m 行,每行给出一个查询的目标性能得分 x,同样在区间 [0, 10⁸] 内。
输出格式:
首先第一行按升序列出所有性能得分最高的参数组合的编号。同行数字间以 1 个空格分隔,行首尾不得有多余空格。
随后对每一次查询 x,我们需要从所有性能得分大于 x 的参数组合中,找到并输出那个得分最小的组合编号。如果这样的参数组合不唯一,则输出编号最小的解。如果这样的参数组合不存在,则输出 0。
思路
题意:先在一行中输出最大值的序号,如果有多个则用空格隔开。然后接收几组查询值 x ,从所有性能得分大于等于 x 的参数组合中,找到并输出得分最小的序号。
class Solution { private static final int MOD = 1000000007;
public int concatenatedBinary(int n) { long result = 0; int shift = 0; // 移位数 for (int i = 1; i <= n; i++) { // 判断一个数是否为2的幂 if ((i & (i - 1)) == 0) { shift++; } result = ((result << shift) | i) % MOD; } return (int) result; } }
在将项目升级到 Spring Boot 3.2.x + Java 17 后,项目在启动阶段直接退出,没有
Exception in thread "main" 或 Caused by,导致问题难以定位。
最初怀疑过:
Knife4j / Swagger
Hutool 工具类
枚举定义
配置文件错误
但检查后发现都不是原因。
报错信息
开启 DEBUG 日志后,启动过程中出现如下关键信息:
1 2 3 4 5
Creating MapperFactoryBean with name 'userMapper' ... Exception encountered during context initialization - cancelling refresh attempt: java.lang.IllegalArgumentException: Invalid value type for attribute 'factoryBeanObjectType': java.lang.String
子矩阵修改 对(x1,y1)到(x2,y2)加上val diff[x1][y1] += val diff[x2+1][y1] -= val diff[x1][y2+1] -= val diff[x2+1][y2+1] += val
模板
1
2
3
4
5
6
7
8
9
10
11
12
public class Main { // 求数组的差分数组 public int[] Diff(int[] nums) { int n = nums.length; int[] diff = new int[n]; diff[0] = nums[0]; for (int i = 0; i < n; i++) { diff[i] = diff[i + 1] - nums[i]; } return diff; } }
class Solution { // 求和 >= target 的最短子数组长度 public int minSubArrayLen(int target, int[] nums) { int n = nums.length; int left = 0, sum = 0; int ans = Integer.MAX_VALUE;
for (int right = 0; right < n; right++) { sum += nums[right]; while (sum >= target) { ans = Math.min(ans, right - left + 1); sum -= nums[left]; left++; } } return ans == Integer.MAX_VALUE ? 0 : ans; } }
适用范围
连续子数组 / 子串
满足某种约束(和、字符种类数等)
最短 / 最长 区间问题
例题
904.水果成篮
你正在探访一家农场,农场从左到右种植了一排果树。这些树用一个整数数组 fruits 表示,其中 fruits[i] 是第 i 棵树上的水果 种类 。
class Solution { // 返回每个元素右侧第一个更大的元素 public int[] nextGreater(int[] nums) { int n = nums.length; int[] res = new int[n]; Arrays.fill(res, -1); Deque<Integer> stack = new ArrayDeque<>();
for (int i = 0; i < n; i++) { while (!stack.isEmpty() && nums[stack.peek()] < nums[i]) { int idx = stack.pop(); res[idx] = nums[i]; } stack.push(i); } return res; } }
while (!queue.isEmpty()) { int cur = queue.poll(); for (int next : graph[cur]) { if (!visited[next]) { visited[next] = true; queue.offer(next); } } } }
class HanoiTower{ public void move(int n, char from, char to, char aux){ if (n == 1){ System.out.println("Move disk 1 from " + from + " to " + to); return; } move(n-1, from, aux, to); System.out.println("Move disk " + n + " from " + from + " to " + to); move(n-1, aux, to, from); } }
class Solution { public int ans; public int diameterOfBinaryTree(TreeNode root) { dfs(root); return ans; } private int dfs(TreeNode node){ if(node == null){ return -1; } int l = dfs(node.left) + 1; int r = dfs(node.right) + 1; ans = Math.max(l + r, ans); return Math.max(l,r); } }
class Iteration { public List<Integer> inorderTraversal(TreeNode root) { List<Integer> ans = new ArrayList<>(); Stack<TreeNode> stack = new Stack<>(); TreeNode curr = root;
class Mirris { public List<Integer> inorderTraversal(TreeNode root) { List<Integer> ans = new ArrayList<>(); TreeNode curr = root; while (curr != null) { if (curr.left == null) { ans.add(curr.val); curr = curr.right; } else { // 找到左子树的最右节点(前驱) TreeNode pre = curr.left; while (pre.right != null && pre.right != curr) { pre = pre.right; } if (pre.right == null) { // 建立线索 pre.right = curr; curr = curr.left; } else { // 线索已存在,说明左子树已遍历完 pre.right = null; // 恢复树结构 ans.add(curr.val); curr = curr.right; } } } return ans; } }
时间复杂度:O(n)
空间复杂度:O(1)
4.测试
1 2 3 4 5 6 7 8 9 10 11 12 13 14 15 16 17 18 19
public class Main { public static void main(String[] args) { TreeNode root = new TreeNode(1); root.right = new TreeNode(2); root.right.left = new TreeNode(3);
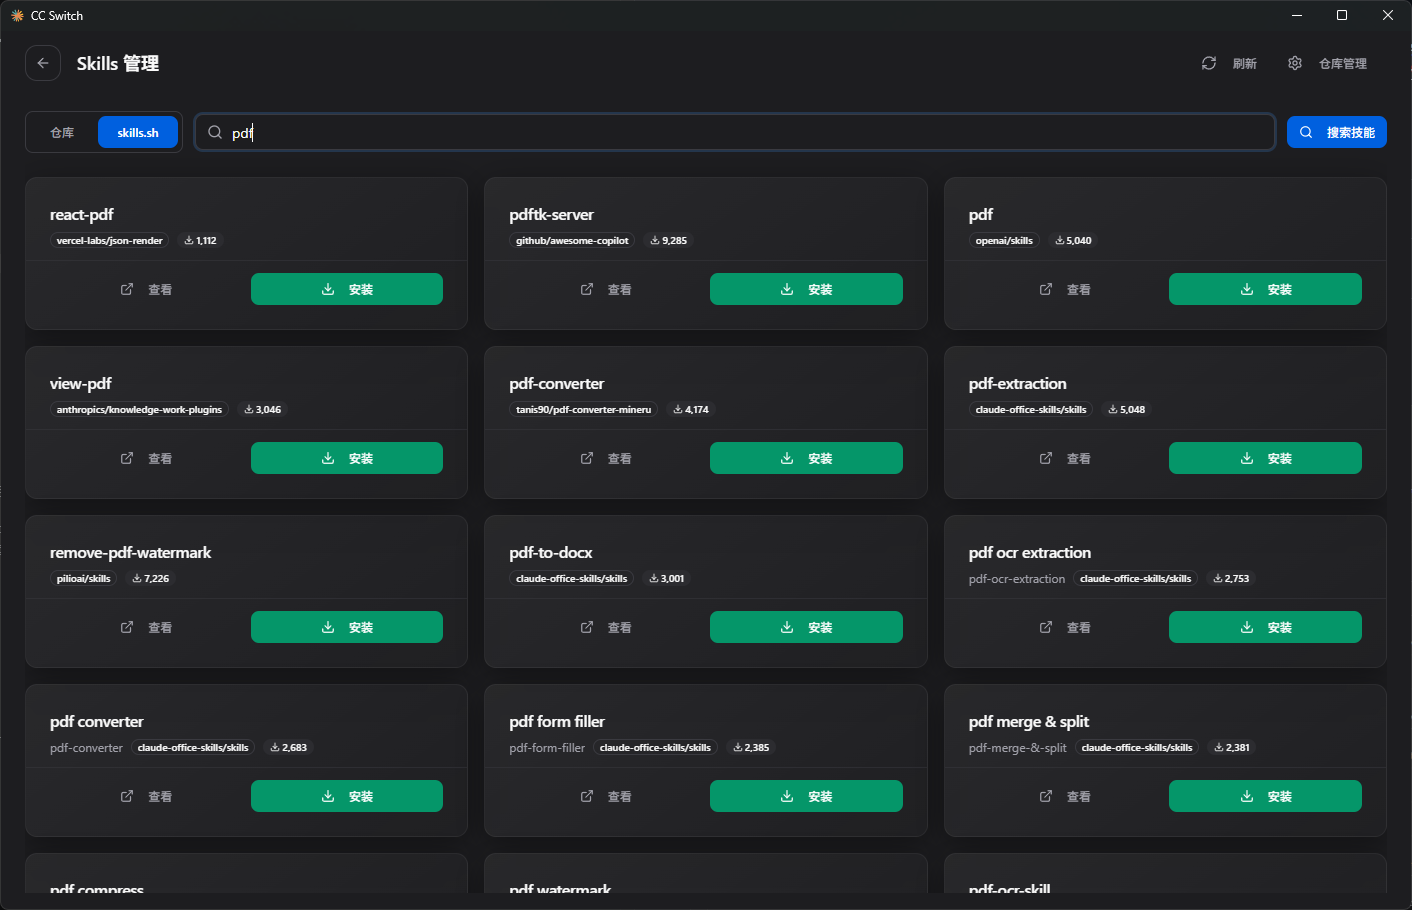
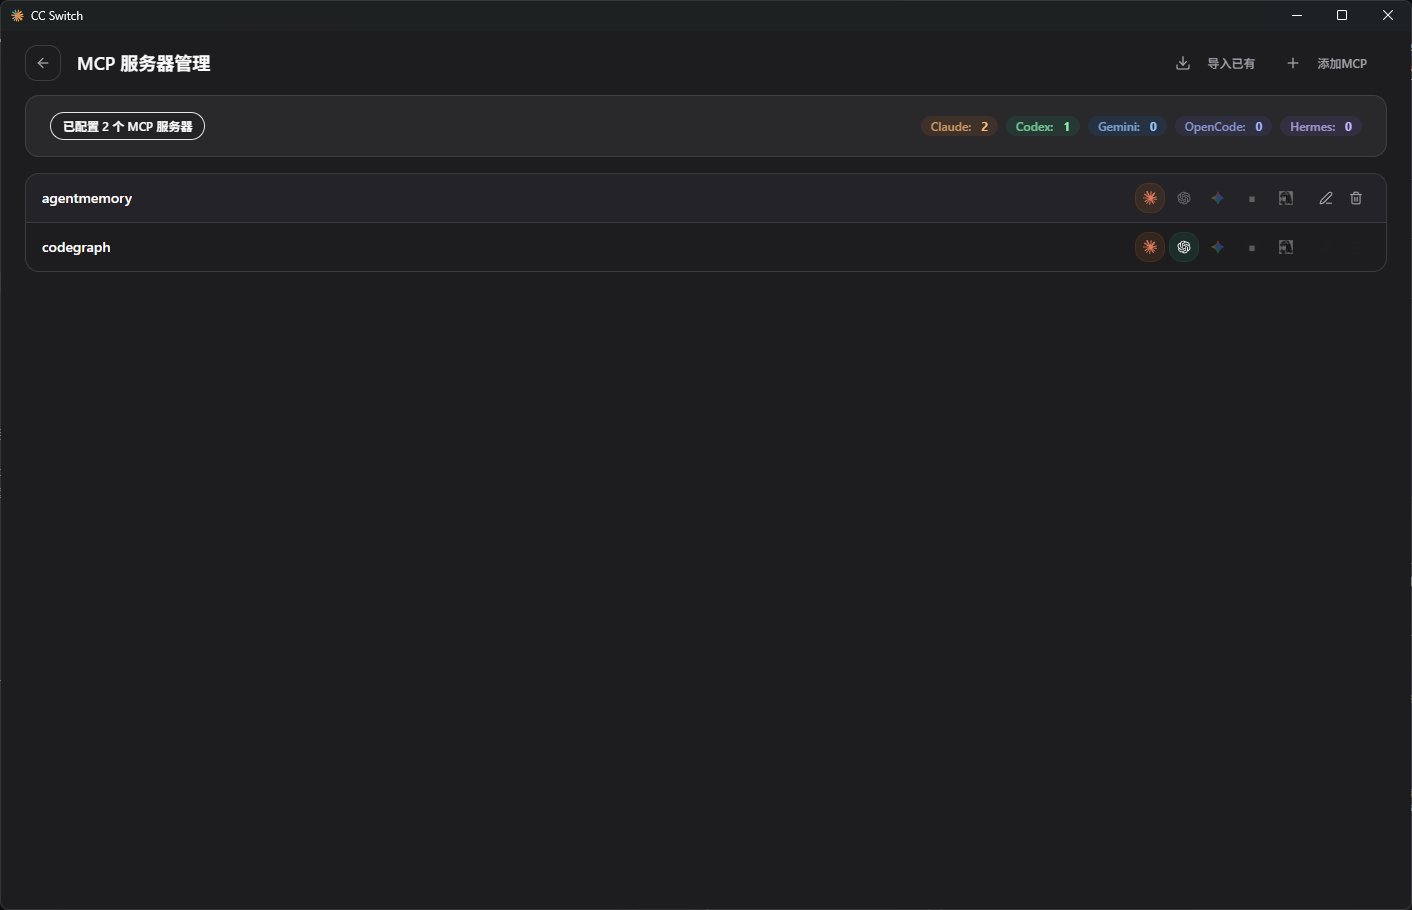
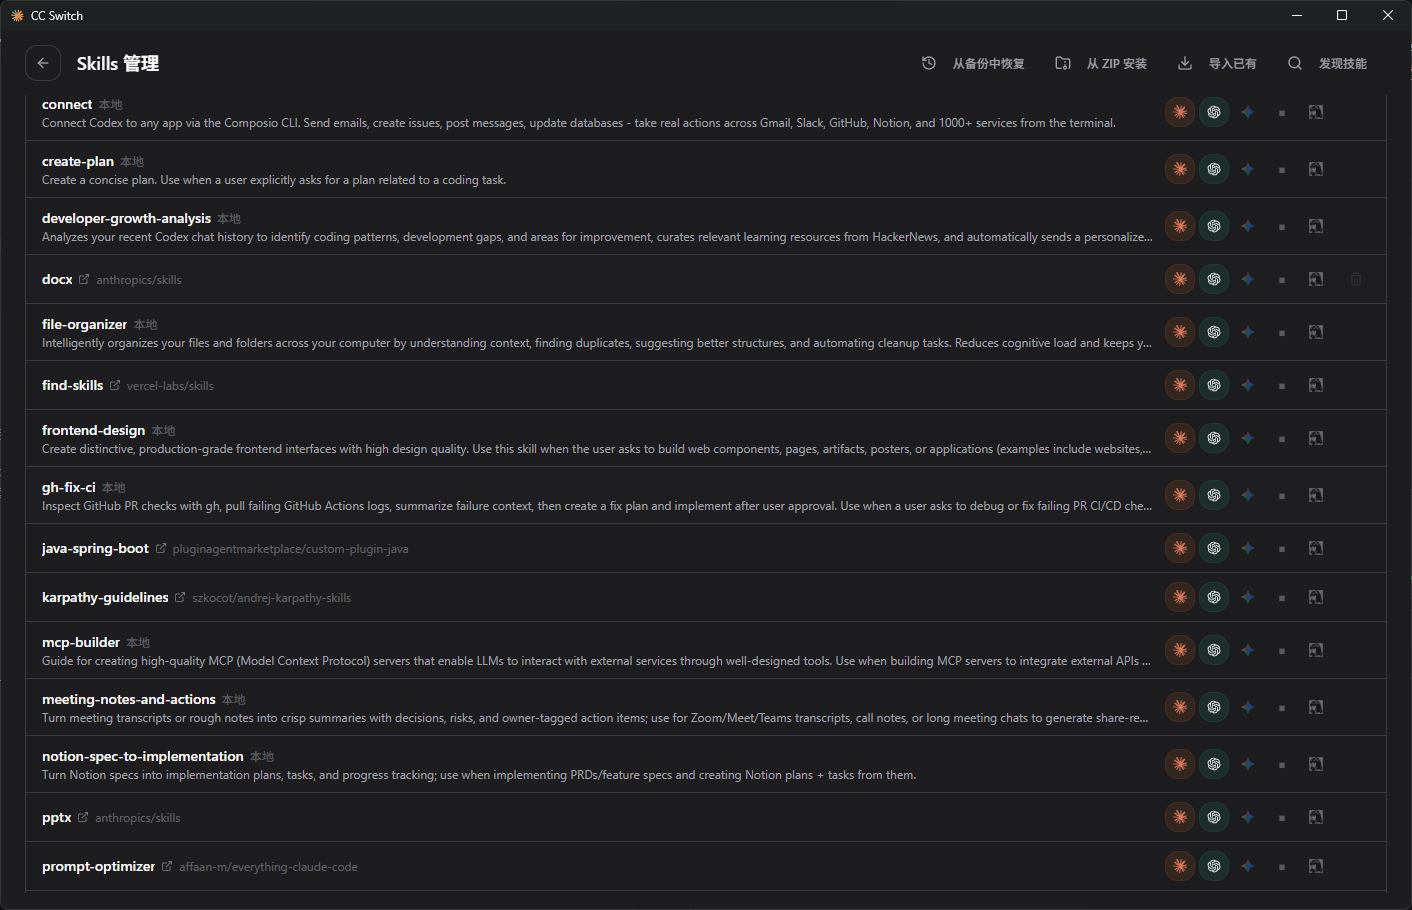 点击发现技能即可进入下载页面,它会自行在Github中查找对应的仓库,点击安装即可进行自动下载并配置。(有些skills无法使用cc-switch安装,点击安装左侧的查看即可跳转到GitHub下载,安装好后在cc-switch选择导入已有即可进行管理)